Evaluating Fence Health: Restoration vs. Replacement
Restoring a fence begins with a systematic five-step process: deep clean the wood with an oxygen bleach cleaner and wood brightener, repair loose pickets and rotted sections with exterior epoxy or screws, sand the dry wood until its moisture content reads below 15%, apply a penetrating stain or exterior paint, and seal vulnerable end grains and post bases. This approach works best when the fence is structurally sound; before rolling up your sleeves, check that your boundary is a prime candidate for a makeover rather than nearing the end of its functional life.
We evaluate structural stability, rot severity, and alignment across posts and rails. If fewer than 20% to 25% of the fence pickets are damaged and your main support posts remain plumb and firm in the ground, restoration is almost always your best bet.
When posts lean dramatically or show significant movement when pushed, the concrete footing or below-ground wood has likely failed. When faced with extensive decay or widespread collapse, you can reference our repair vs replace fence guide to weigh whether spot stabilization makes sense or if a brand-new setup is required.
Screwdriver Test and Structural Damage Criteria
To catch hidden structural rot before spending time on surface treatments, use the simple "screwdriver test." Take a standard flat-head screwdriver and press the tip firmly into post bases near the groundline, bottom rails, and picket joints where moisture tends to pool.
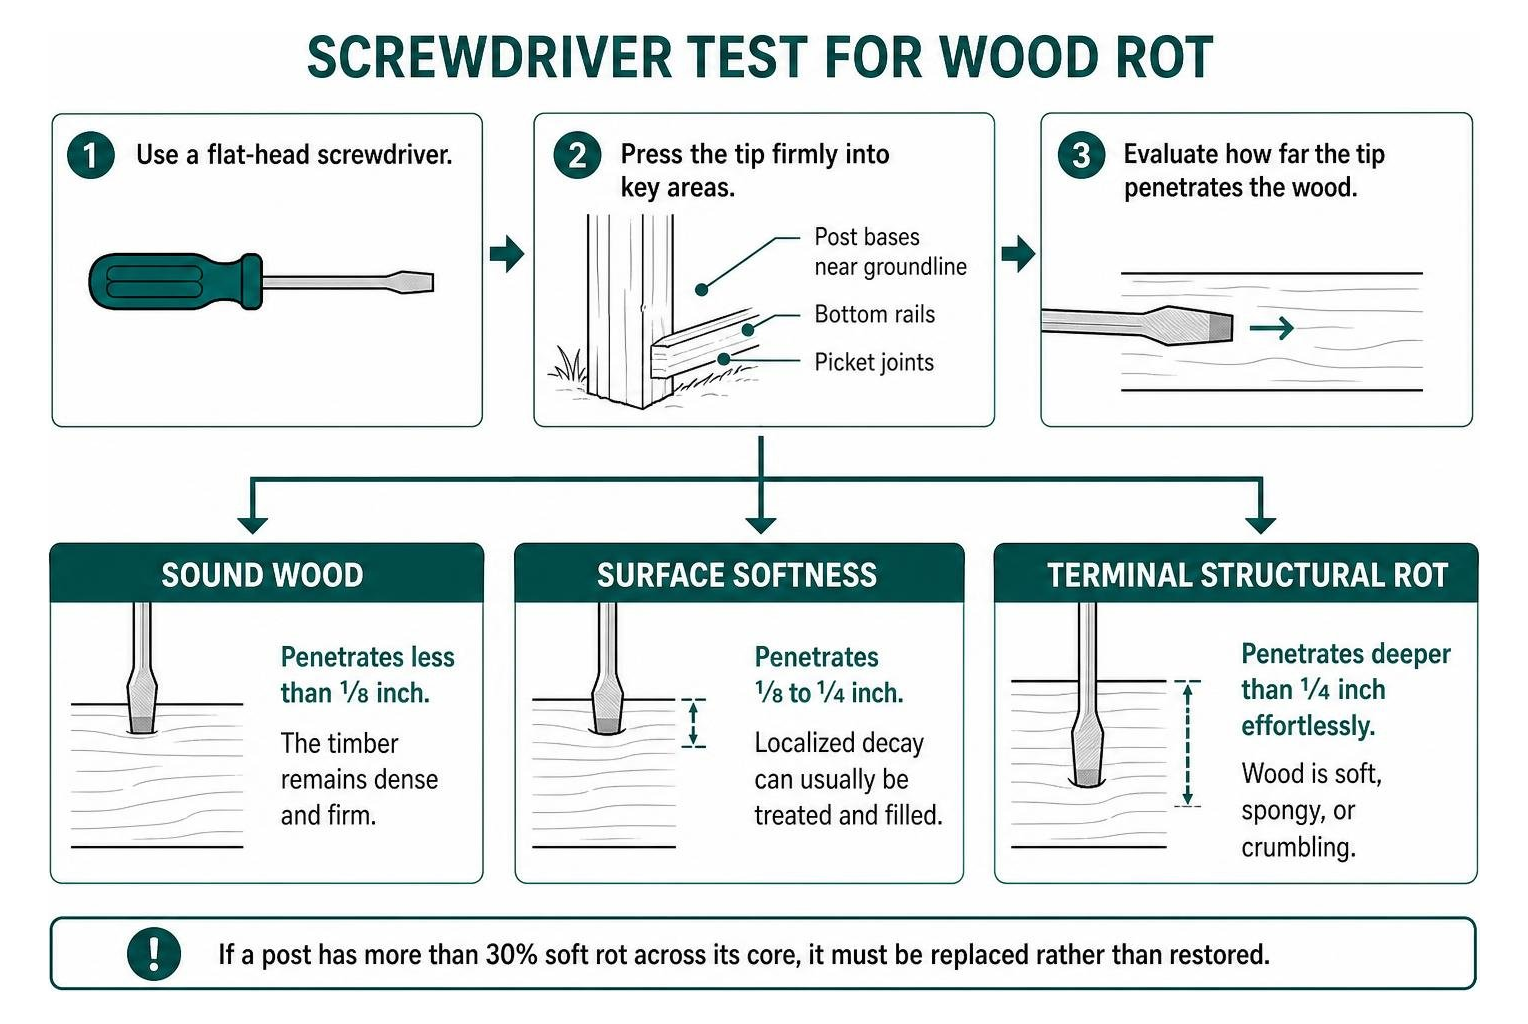
- Sound Wood: The screwdriver tip resists entry or penetrates less than 1/8 inch. The timber remains dense and firm.
- Surface Softness: The tip sinks 1/8 to 1/4 inch. This localized decay can usually be scraped away, treated with a liquid wood hardener, and filled with an exterior two-part wood epoxy.
- Terminal Structural Rot: The screwdriver sinks deeper than 1/4 inch effortlessly, revealing soft, spongy, or crumbling wood fibers. If a post suffers from more than 30% soft rot across its core, it must be replaced rather than restored.
You should also look for heavy warping, extensive insect tunneling, or loose posts that wobble freely in the soil. Sound posts and rails can easily be fitted with fresh pickets, but rotten support posts compromise the safety and containment of your entire yard.
Cost Analysis: Restoring vs. Rebuilding
Opting for complete fence restoration instead of a full teardown and rebuild delivers massive savings while keeping usable building materials out of local landfills. In most cases, a thorough restoration costs between 40% and 60% less than installing a brand-new wooden fence.
| Metric | Fence Restoration | Complete Fence Replacement |
|---|---|---|
| Average Cost per Linear Foot | $5 – $10 | $15 – $30+ |
| Typical Project Timeline | 2 – 4 Days | 1 – 2 Weeks |
| Added Functional Lifespan | 5 – 10 Additional Years | 15 – 20 Years (New) |
| Material Landfill Waste | Minimal (spot boards only) | Complete fence disposal |
| Primary Project Focus | Deep cleaning, repairs, sealing | Excavation, digging, post setting |
Restoration preserves the capital you have already invested in your landscape. If you are comparing professional bids for containment solutions, make sure to take advantage of our Beat My Estimate program to get the most value for your outdoor property improvements.
Essential Tools, Materials, and Safety Preparation
Proper preparation ensures a smooth restoration process and professional-grade results. Assembling the right equipment upfront prevents mid-project runs to the hardware store and protects both your landscaping and your personal safety.
Required Tools and Equipment:
- Pressure Washer: Rated between 1,500 and 2,000 PSI with a 25-degree (green) spray tip.
- Sanding Gear: Random orbital sander with 60-grit and 80-grit aluminum oxide sanding discs.
- Application Tools: Chemical-resistant pump sprayer, 4-inch exterior stain brushes, 3/8-inch nap roller, and paint tray.
- Fasteners and Repair Hardware: 2-inch to 2.5-inch exterior-grade ceramic-coated or stainless steel screws, two-part exterior wood epoxy, wood hardener, and gate anti-sag turnbuckle kit.
- Diagnostic Tools: Wood pin-style moisture meter.
- Personal Protective Equipment (PPE): Safety glasses, nitrile and work gloves, dust mask/respirator (rated N95 or better), and sturdy rubber boots.
- Landscape Protection: Heavy-duty canvas drop cloths or plastic tarps to protect nearby flowerbeds and turf.
DIY Preparation vs Professional Fence Restoration
Taking on a fence refresh as a weekend DIY project can be deeply satisfying, but it requires significant physical effort, tool rentals, and strict attention to wood moisture levels. A standard 150-linear-foot fence often demands 15 to 25 hours of active labor spread over multiple dry days.
Engaging dedicated fence restoration services takes the guesswork out of chemical balancing, post stabilization, and uniform finish application. Professional crews utilize commercial equipment that safely lifts years of embedded grime without gouging delicate wood grains, saving you days of strenuous labor.
Surface Cleaner and Chemical Selection
Restoring the bright, natural look of aged wood requires the right cleaning chemistry. Avoid straight household chlorine bleach, which breaks down wood lignin, leaves timber unnaturally pale, and harms surrounding vegetation.
- Oxygen Bleach (Sodium Percarbonate): The safest and most effective deep-cleaning agent. It lifts embedded dirt, mold, and mildew without destroying the cellular structure of cedar, redwood, or pressure-treated pine.
- Wood Brighteners (Oxalic or Citric Acid): Crucial after cleaning. Highly alkaline cleaners darken wood tannin; applying an oxalic acid brightener balances the wood's pH, opens the grain pores, and instantly neutralizes dark gray discoloration to reveal rich, golden tones.
- Mildewcides: Formulated additives in quality exterior finishes that prevent spores from establishing roots deep within the lumber.
The 5-Step Fence Restoration Process
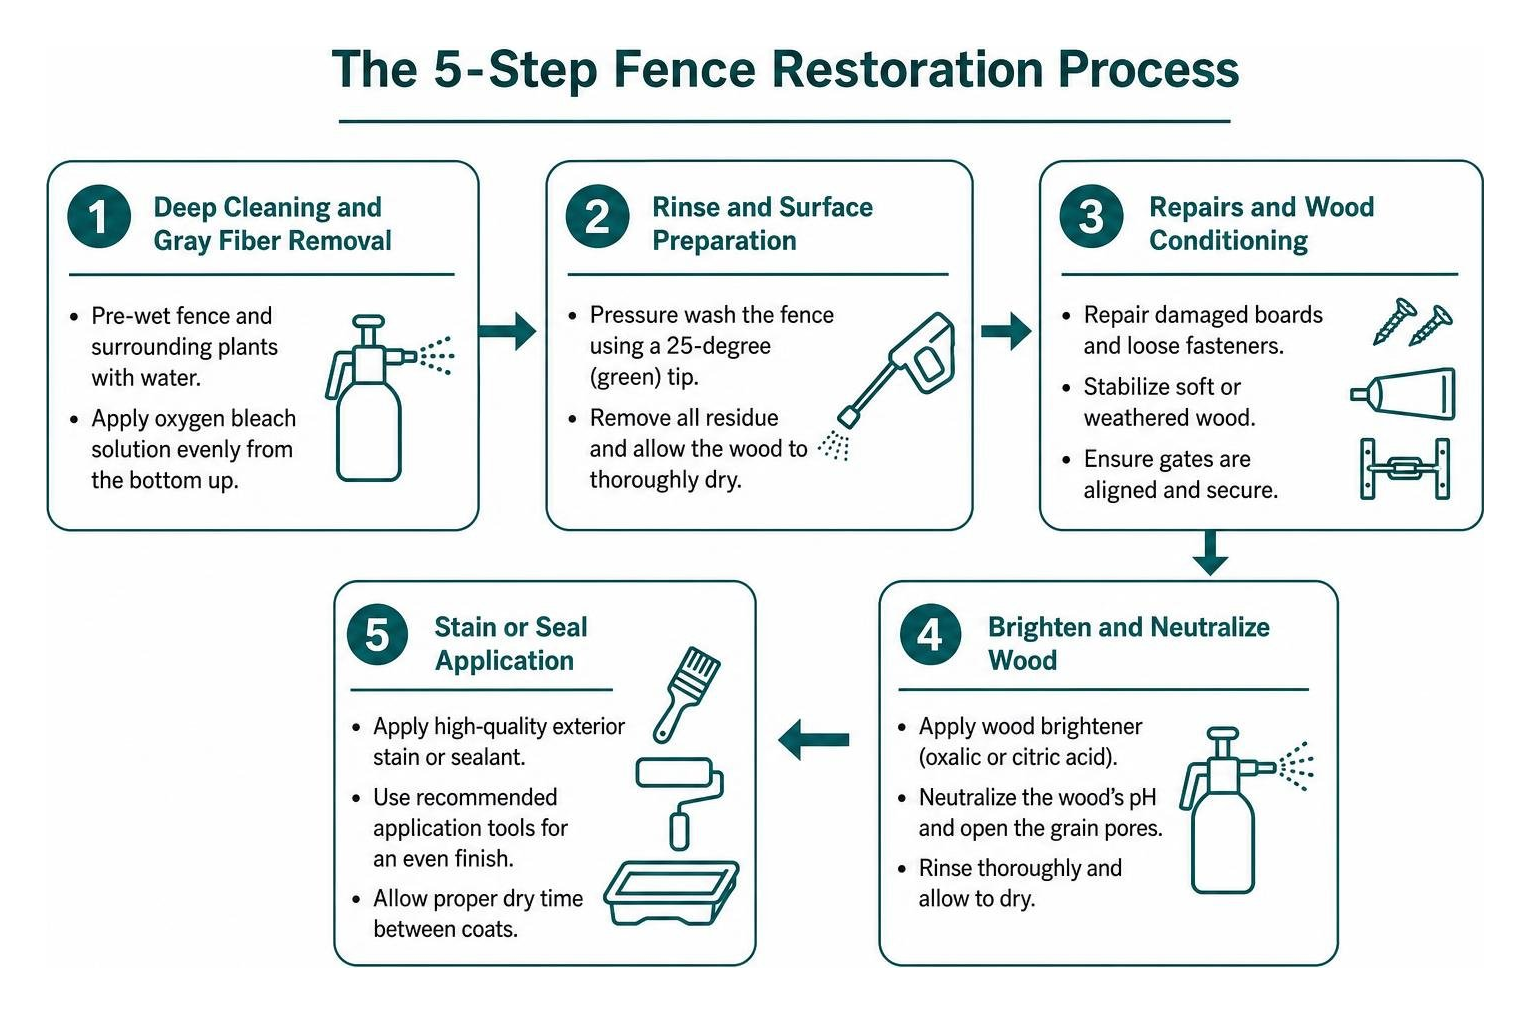
Achieving a durable, showroom-quality finish requires sticking to a methodical, step-by-step restoration workflow.
Step 1: Deep Cleaning and Gray Fiber Removal
Over time, ultraviolet sun exposure degrades the surface layer of wood, breaking down natural binders and leaving behind loose, dead gray fibers. Start by thoroughly pre-wetting the fence and surrounding plants with plain water.
- Mix your oxygen bleach solution in a clean pump sprayer and apply it evenly working from the bottom up to prevent streaking.
- Allow the cleaner to dwell on the timber for 15 to 20 minutes without letting it dry out completely.
- Hook up your pressure washer set between 1,500 and 2,000 PSI with a 25-degree tip.
- Hold the wand tip 12 to 18 inches away from the wood surface, moving continuously along the direction of the grain. Never stop in one spot, and avoid high-pressure nozzles that gouge deep trenches into soft cedar.
- Apply your oxalic acid wood brightener immediately after washing, let it dwell for 10 minutes to bring back natural wood color, and rinse with low garden hose pressure.
Step 2: Repairing Structural Weaknesses and Hardware
Once the fence surface is clean, address structural defects, loose connections, and alignment problems.
- Secure Loose Pickets: Remove rusted, popping nails and replace them with 2-inch exterior ceramic-coated screws. Countersink screw heads slightly beneath the surface.
- Repair Split Boards: Pry open small splits, inject waterproof exterior polyurethane wood glue, clamp tightly for 24 hours, and secure with a reinforcing screw.
- Fix Moderate Soft Spots: Scrape away soft fiber decay, coat with liquid wood hardener, and pack voids with two-part exterior wood epoxy. Shape flush with a putty knife.
- Realign Sagging Gates: Wooden gates often sag under their own weight. Attach an adjustable anti-sag gate turnbuckle diagonally from the top hinge corner down to the opposite bottom latch corner. Tighten the central turnbuckle body to pull the frame back into square.
Step 3: Sanding and Moisture Testing
Do not apply stains or coatings to damp or rough wood. Washing naturally raises the wood grain, creating a fuzzy texture known as "furring."
Let the fence dry thoroughly for 48 to 72 hours. Check the wood using a pin-style moisture meter; the moisture content must read below 12% to 15% before applying penetrating finishes.
Once dry, run a random orbital sander equipped with 60-grit or 80-grit sandpaper along the grain of the pickets and top rails. Sanding knocks down raised wood splinters, removes lingering patches of gray oxidation, and opens the pores of the timber so finishes can soak in deeply. Wipe away all fine sanding dust with a dry microfiber cloth or stiff-bristled brush.
Step 4: Applying Primer, Stain, or Paint
When your wood is clean, repaired, dry, and sanded, it is ready for coating. Always work during mild weather, ideally between 50°F and 80°F, away from direct midday sun.
- Staining: Use a semi-transparent, penetrating oil-based stain. Spray or roll the product onto two to three pickets at a time, then immediately back-brush using a high-density natural bristle brush. Back-brushing pushes the stain deep into wood crevices, eliminates drips, and prevents uneven overlapping lap marks.
- Painting: If painting, always apply an oil-based, tannin-blocking exterior primer first. This prevents natural wood oils from bleeding through as unsightly yellow stains. Follow with two coats of 100% exterior acrylic latex paint for optimal flexibility.
Step 5: Weatherproof Sealing and Post Base Protection
The final step provides long-term defense against moisture penetration and rot.
- End-Grain Treatment: The top and bottom cut ends of fence pickets absorb moisture up to ten times faster than flat board faces. Generously coat these end-grains with a clear penetrating sealer.
- Groundline Post Protection: Brush a copper naphthenate-based wood preservative onto all exposed post bases right at the soil level where moisture and fungi thrive.
- Hardware Lubrication: Apply a marine-grade silicone spray or white lithium grease to gate hinges, latches, and drop rods to ensure smooth mechanical operation.
Choosing the Best Protective Finish and Long-Term Care
Selecting the right protective coating determines how your fence handles changing seasons and direct sun exposure.
Staining vs Painting vs Sealing Comparison
Every finish option provides distinct aesthetic characteristics and maintenance demands:
- Penetrating Oil-Based Stains:
- Pros: Soaks deep into wood pores without forming an impermeable surface film; will never crack, peel, or blister; highlights natural wood grain; easiest to re-apply later without sanding.
- Cons: Requires re-application every 2 to 4 years.
- Exterior Acrylic Paints:
- Pros: Delivers rich, uniform color; offers maximum UV blocking capability; wide range of custom colors.
- Cons: Sits on top of the timber; prone to peeling and moisture-trapping over time; requires heavy scraping and sanding before repainting.
- Clear Topical Sealers:
- Pros: Keeps the completely raw, natural look of wood; provides basic water shedding.
- Cons: Lacks UV-blocking pigments, meaning the wood will turn gray within 12 to 18 months; requires yearly re-coating.
To see how finished boundaries look across various yard styles, browse through our completed builds in our project gallery.
Expected Lifespan and Care After Fence Restoration
A well-executed restoration adds 5 to 10 productive years to your fence's operational life. To maximize your investment, follow these simple maintenance practices:
- Perform an Annual Water-Bead Test: Splash water onto various areas of the fence. If water beads up into tight droplets, your seal is strong. If water soaks immediately into the wood, darkening the grain, it is time for a maintenance coat.
- Trim Surrounding Vegetation: Keep grass, vines, and shrubs cut back at least 6 to 12 inches from pickets to improve airflow and stop ground moisture from transferring to your wood.
- Annual Light Wash: Rinse away pollen, surface dirt, and bird droppings each spring using a garden hose and a mild soap solution.
Frequently Asked Questions
Can a gray, weathered fence be restored to its original color?
Yes. Gray discoloration is typically surface-level oxidation caused by sun exposure breaking down surface wood fibers. Cleaning the fence with an oxygen bleach solution, following with an oxalic acid wood brightener, and lightly sanding with 80-grit paper will remove these dead cells and uncover the vibrant, golden wood underneath.
How long must a fence dry after washing before staining?
A fence must dry for at least 48 to 72 hours under warm, dry weather conditions after washing. Always verify dryness with a pin-style wood moisture meter; the moisture level must read below 12% to 15% before applying oil stains or primers. Applying finishes to damp wood traps internal water, leading to cloudiness, poor adhesion, and premature peeling.
What is the typical cost difference between restoring and replacing a fence?
Restoring a fence generally costs 40% to 60% less than a full replacement. Surface restoration, minor repairs, and sealing average $5 to $10 per linear foot, whereas a full teardown and new wooden fence installation typically ranges from $15 to $30 or more per linear foot.
Conclusion
Restoring your fence enhances your home's curb appeal, extends your boundary's lifespan, and preserves sound timber with minimal environmental waste. With a systematic cleaning, simple carpentry repairs, and a high-grade penetrating finish, you can bring an aged, gray fence back to life in just a few days.
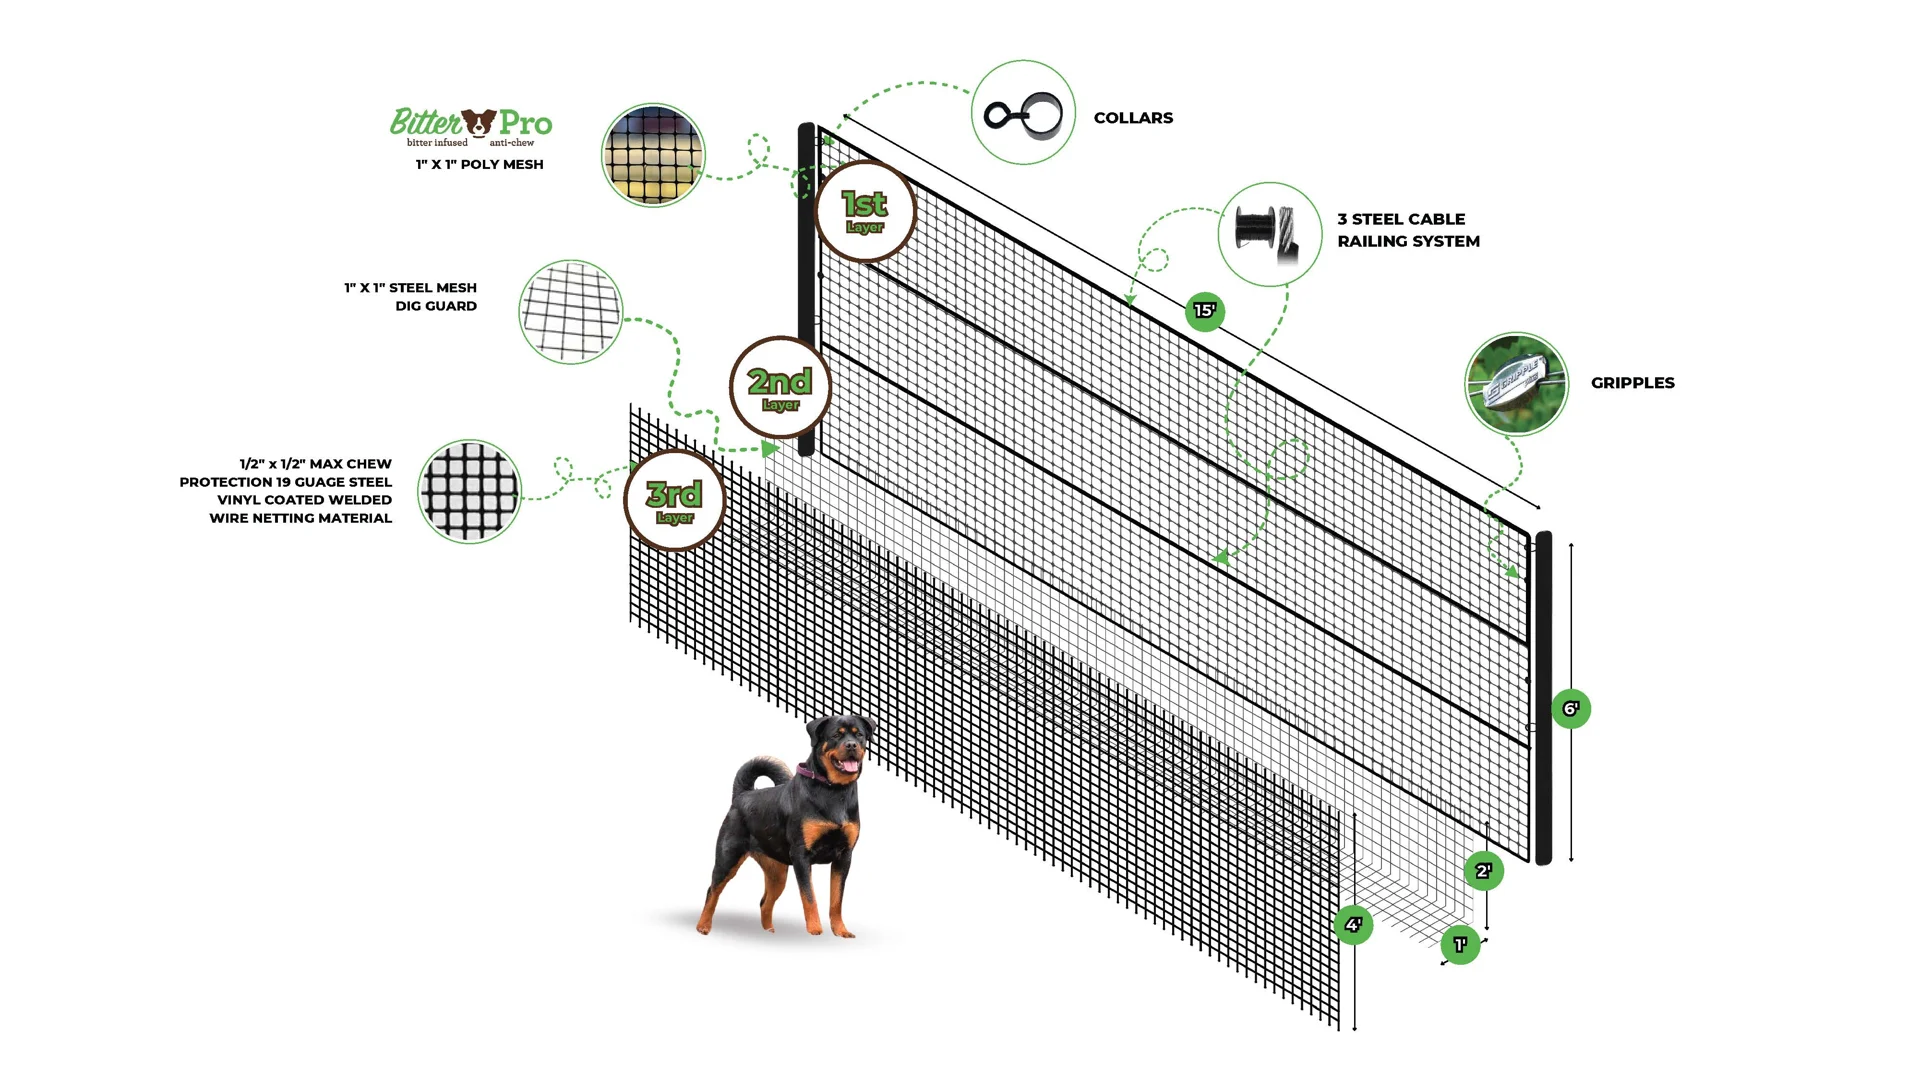
When property lines require high-strength, unobtrusive containment to keep dogs secure or gardens protected from deer, traditional bulky fences are not your only choice. At Modern Fence Install, we install engineered, non-electric steel-cable and low-profile mesh systems throughout Connecticut, New York, and Massachusetts. Our dig-free, nearly invisible boundary setups install in under 30 days and save you 30% or more compared to conventional solid wood barriers.
If you are evaluating boundary improvements in Essex County, you can schedule a personalized property evaluation or Contact Us directly today to find the ideal containment solution for your yard.