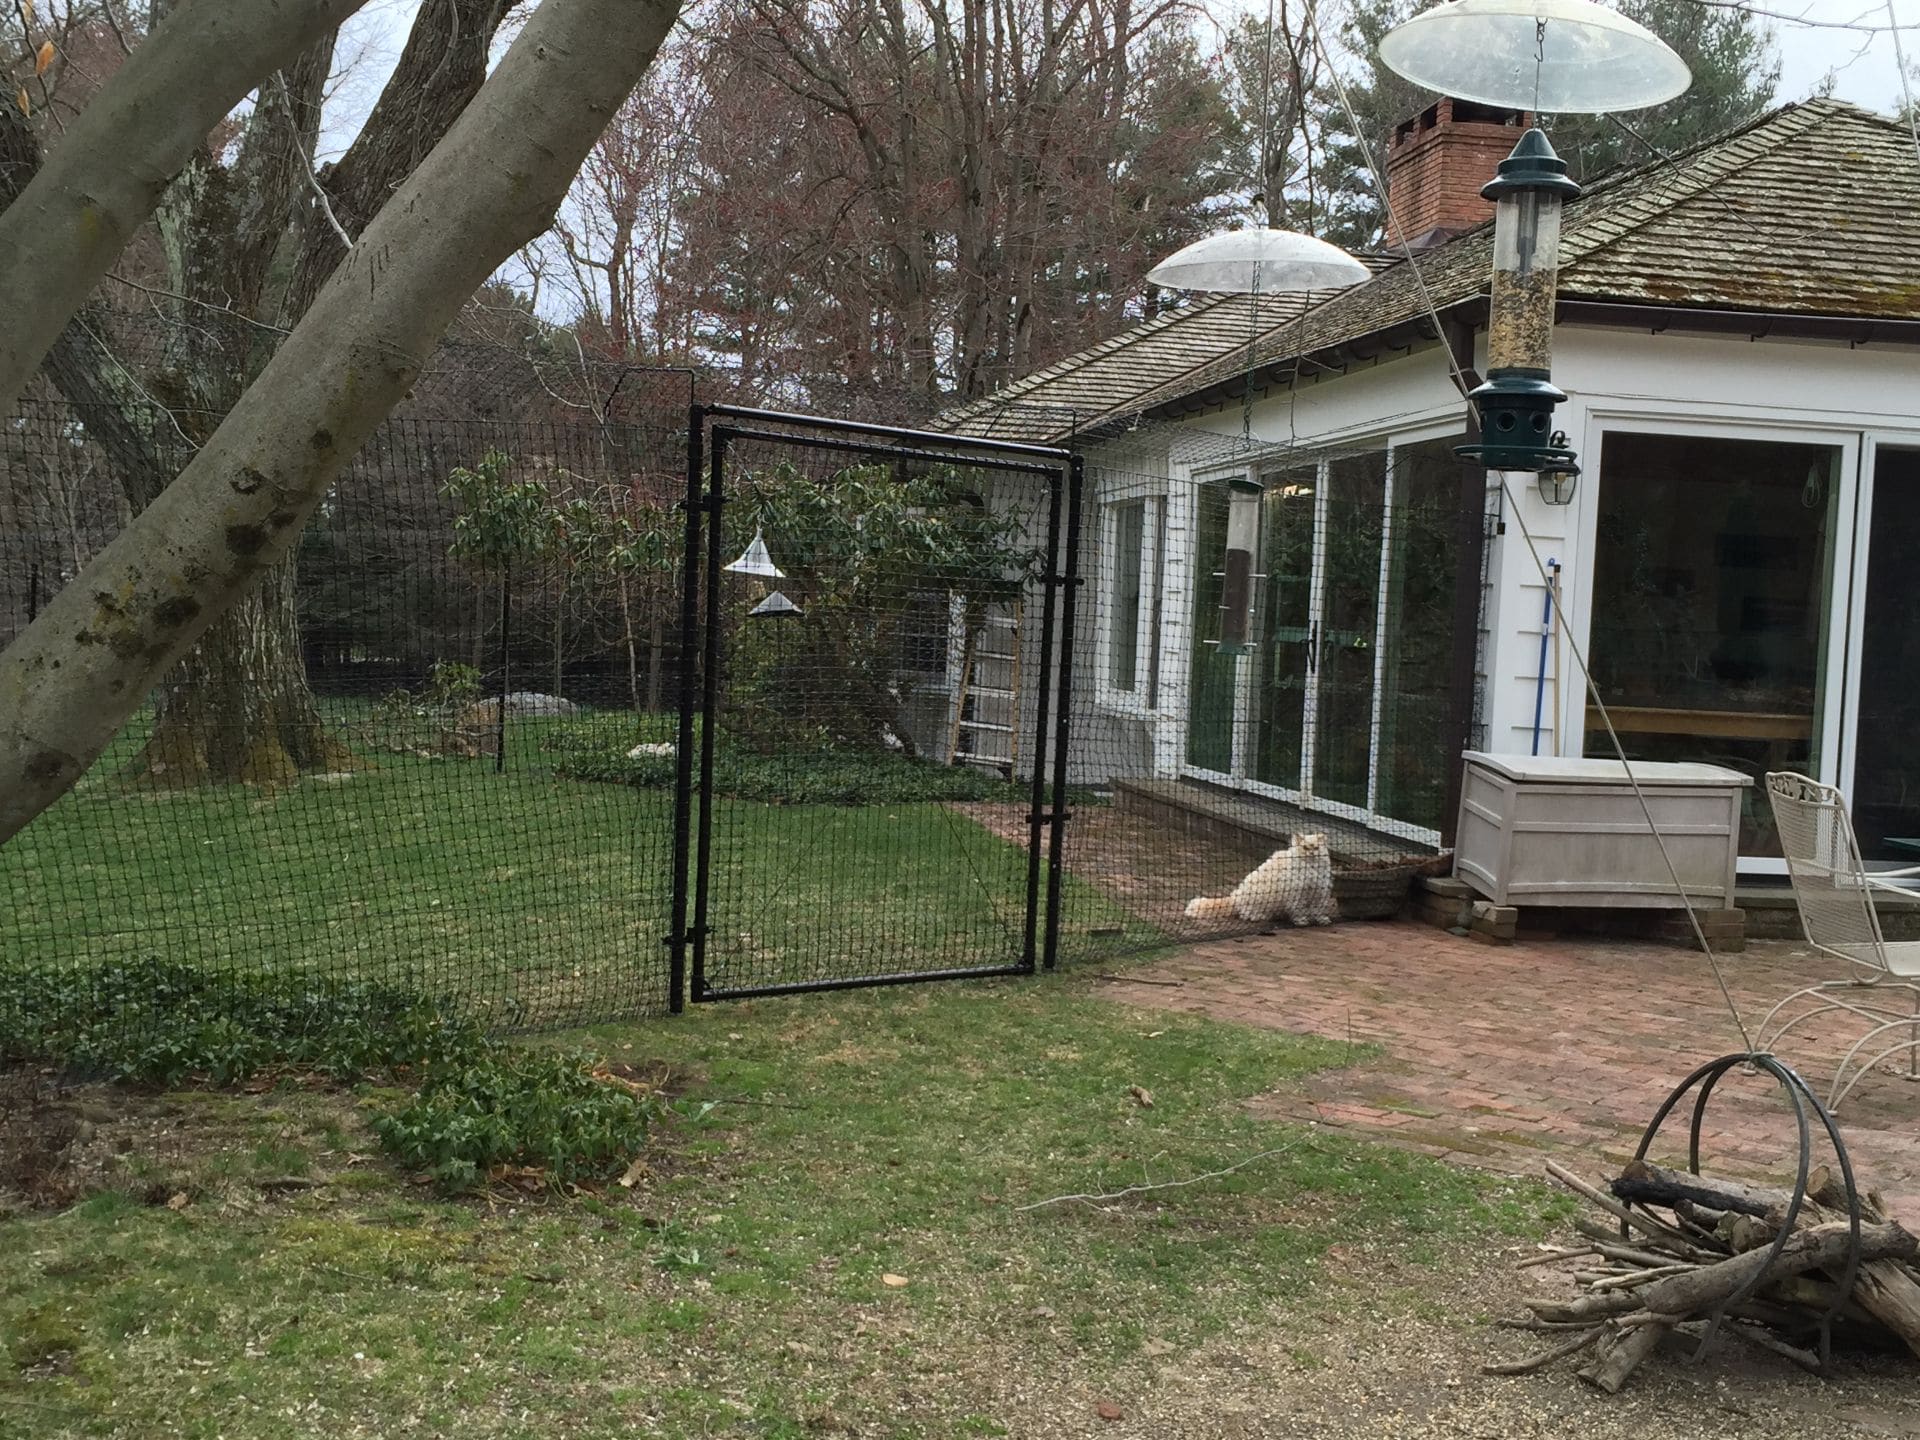
Selecting Materials and Planning Your Deer Fence Installation
Successful deer fence installation involves four core steps: setting sturdy posts spaced 8 to 12 feet apart, running a high-tensile top tension wire, hanging 7.5-to-8-foot UV-resistant mesh, and securing an outward 6-to-12-inch ground apron with heavy-duty stakes. This system prevents white-tailed deer from jumping over or nudging underneath the barrier.
Proper planning saves hours of troubleshooting down the road. Before digging holes or unrolling mesh, define the precise site boundary. Take a rolling measuring wheel along your planned perimeter line to calculate total linear footage, noting every corner, change in grade, and gateway.
Standard post spacing runs every 8 to 12 feet. If your property is exposed to heavy wind gusts or features soft soil, spacing posts closer to 8 feet apart keeps the structure firm. Planning your layout accurately is critical for estimating deer fence cost in 2026, ensuring you order the exact amount of hardware, line posts, and mesh without mid-project delays.
| Material Type | Expected Lifespan | Durability & Strength | Best Use Case | Relative Cost |
|---|---|---|---|---|
| Polypropylene Netting | 5–7 Years | Moderate (UV-stabilized lightweight plastic) | Seasonal vegetable plots, moderate deer pressure | Budget-Friendly |
| HDPE Mesh | 10–20 Years | High (Heavy-duty tensile strength, rot-proof) | Year-round property borders, high deer pressure | Moderate |
| Galvanized Wire / Metal | 20+ Years | Maximum (Chew-proof against rodents) | High-pressure perimeters with burrowing pests | Premium |
Choosing the Right Mesh and Hardware for Deer Fence Installation
Choosing the right barrier material depends on the local wildlife pressure and your aesthetic goals. Polypropylene netting is lightweight and easy to handle, but high-density polyethylene (HDPE) provides superior tensile strength and longevity. Galvanized wire netting offers unmatched chew resistance against smaller rodents at the base.

A standard fence height should reach 7.5 to 8 feet, with determined deer populations requiring up to 10 feet. Opt for a 1-inch by 1-inch mesh size if you need maximum deterrence, or a standard 2-inch by 2-inch mesh for general deer exclusion. Black UV-treated netting remains the industry standard because black absorbs light and visually disappears into wooded backdrops.
Make sure you also gather complete deer fence hardware essentials, including self-tapping screws, heavy-duty cable crimps, turnbuckles, and industrial-grade nylon zip ties.
Essential Tools and Direct Burial Post Layout
Setting sturdy posts is the backbone of any reliable fence. Corner and end posts take the majority of the lateral tension, meaning they require deeper footing and thicker wall gauges than intermediate line posts.
To install direct burial posts:
- Use a mechanical post driver or auger to dig frame post holes.
- For a 7-foot finished gate or corner post, excavate to a recommended hole depth of 20 inches; for a 6-foot finished height, set posts 26 inches deep into the earth.
- Set corner posts plumb with a magnetic level and secure them with high-strength concrete or rapid-setting expanding post foam.
- Space line posts evenly at 8-to-12-foot intervals along your chalk line, adjusting for natural contours in the landscape.
Step-by-Step Guide to Assembling Your Perimeter
Once your corner, end, and line posts are solidly anchored, the physical assembly of the barrier begins. Setting up the mesh properly ensures your enclosure will successfully protect vegetable gardens from deer and rabbits without sagging over time.
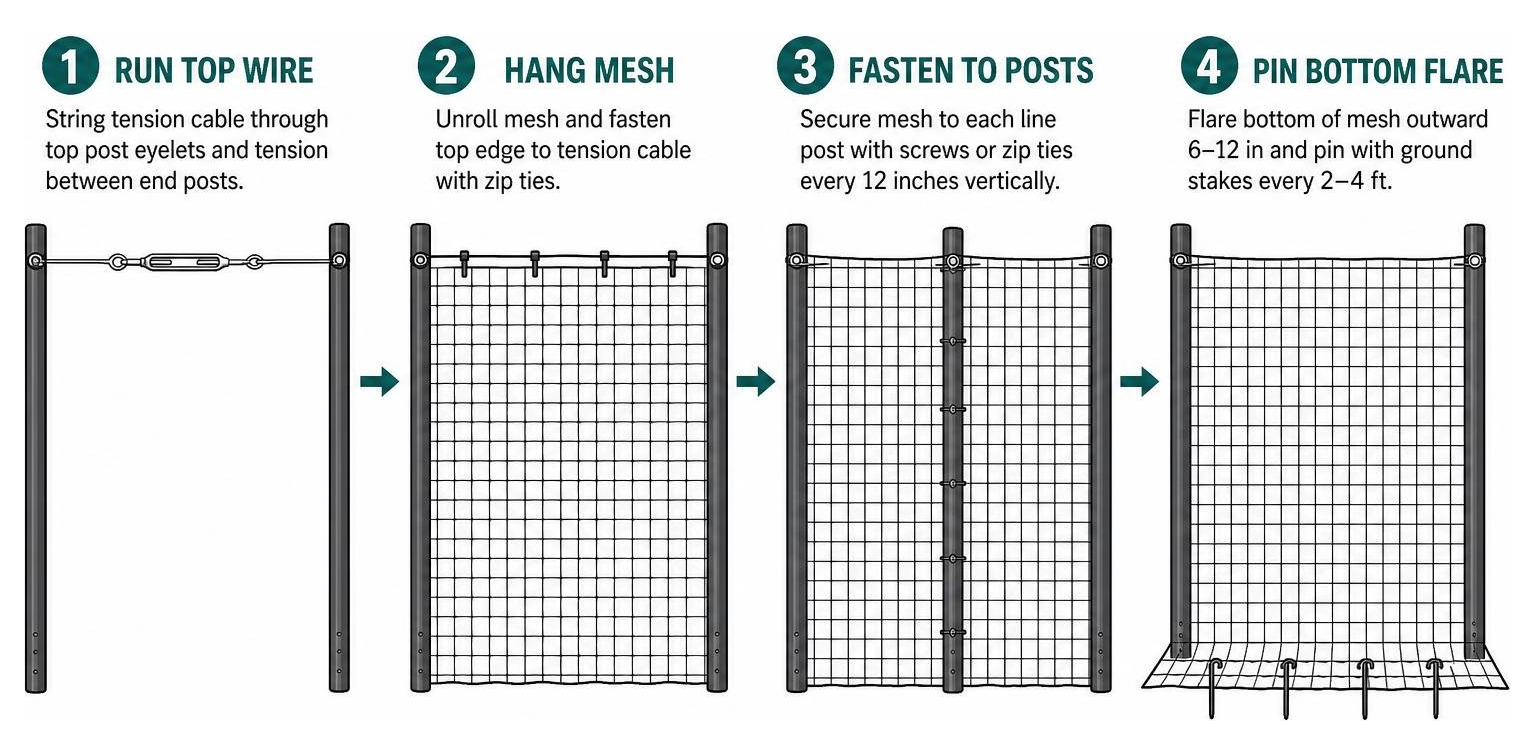
Step-by-Step Deer Fence Netting Guide for Netting and Tension Wire
Installing the mesh under continuous tension prevents deer from pushing through or sagging the top edge:
- Run the Top Tension Cable: String a high-tensile 12.5-gauge monofilament or galvanized steel cable through the top post eyelets. Anchor each end to a heavy-duty corner post using turnbuckles and secure crimping sleeves.
- Unroll and Hang the Mesh: Working from one corner post to the next, unroll the netting along the perimeter. Fasten the top edge of the mesh to the tension cable using UV-resistant nylon zip ties.
- Secure Intermediate Posts: Fasten the mesh to every line post using self-tapping screws and neoprene washers or heavy-duty zip ties spaced every 12 inches vertically.
- Create the Bottom Flare (Apron): Leave roughly 6 to 12 inches of netting flared out horizontally along the ground toward the outside of the garden.
- Pin the Netting Down: Drive heavy-duty kinked ground stakes every 2 to 4 feet along the flare, or bury the lower edge 3 to 6 inches underground to block crawling pests.
For a broader look at modern materials and containment strategies, explore our mesh deer fence ultimate guide for 2026.
Assembling and Aligning a Direct Burial Access Gate
A weak or misaligned gate compromises the entire perimeter. Follow these mechanical steps to build a square, functional access gate:
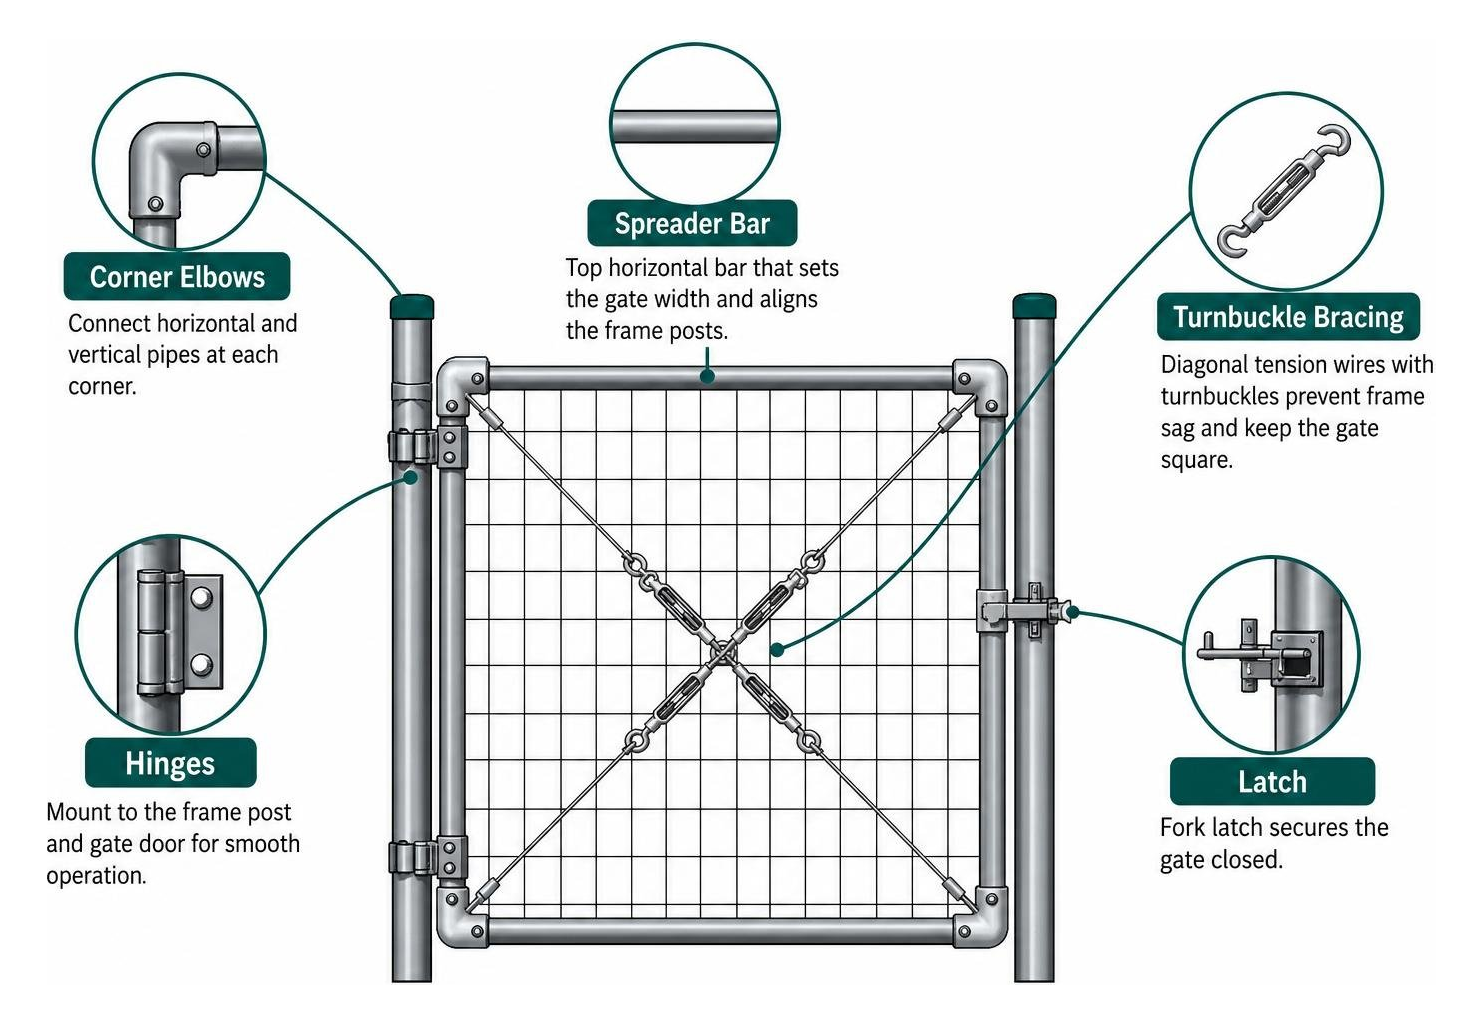
- Position Frame Posts & Spreader Bar: Slide corner elbows onto the top horizontal spreader bar. Insert the vertical frame posts into the corner elbows. Ensure the elbows sit completely flush against the pipe before drilling guide holes with a 5/16" drill bit and securing them with carriage bolts.
- Set the Gate Frame: Place the gate posts into their direct-burial ground holes (20 inches deep for 7-foot gates), square the posts, check level, and backfill with concrete. Let the concrete cure completely.
- Build the Gate Door: Assemble vertical and horizontal gate door pipes using corner elbows and secure them with self-tapping screws.
- Add Diagonal Tension Wire: Install an internal turnbuckle wire diagonally across the door frame in an X-pattern to eliminate frame sag.
- Attach Hinges and Latches: Mount female hinges and a fork latch roughly 18 inches from the top and bottom of the gate door. Fasten male hinges to the frame post and hang the door.
- Fasten the Gate Mesh: Stretch mesh across the gate door frame. Fasten using 1 tie for every 1 foot along the perimeter pipe of the gate door to maintain uniform tension.
Advanced Techniques for Difficult Terrain and Persistent Wildlife

Standard vertical fencing works for most yards, but high deer density or irregular topography calls for advanced deterrence strategies.
Managing Slopes, Trees, and Wind Load
- Stepped vs. Contoured Runs: On mild slopes, contour the bottom wire along the grade. On sharp inclines, step the fence down using extra-tall posts at drop-offs to maintain a continuous 8-foot minimum height.
- Navigating Mature Trees: Never nail mesh directly to growing trees, as trunk expansion will tear the netting. Instead, set independent line posts just inside the root line or use stand-off brackets.
- High-Wind Areas: In wide-open corridors subject to high winds, install heavy-gauge posts and use a low-wind-drag, open-weave mesh to prevent excessive wind load on the tension system.
- Predator & Wildlife Pressure: In rural corridors where perimeter fencing must also manage mid-sized predators, check our guide on stopping coyotes and larger wildlife for baseline containment rules.
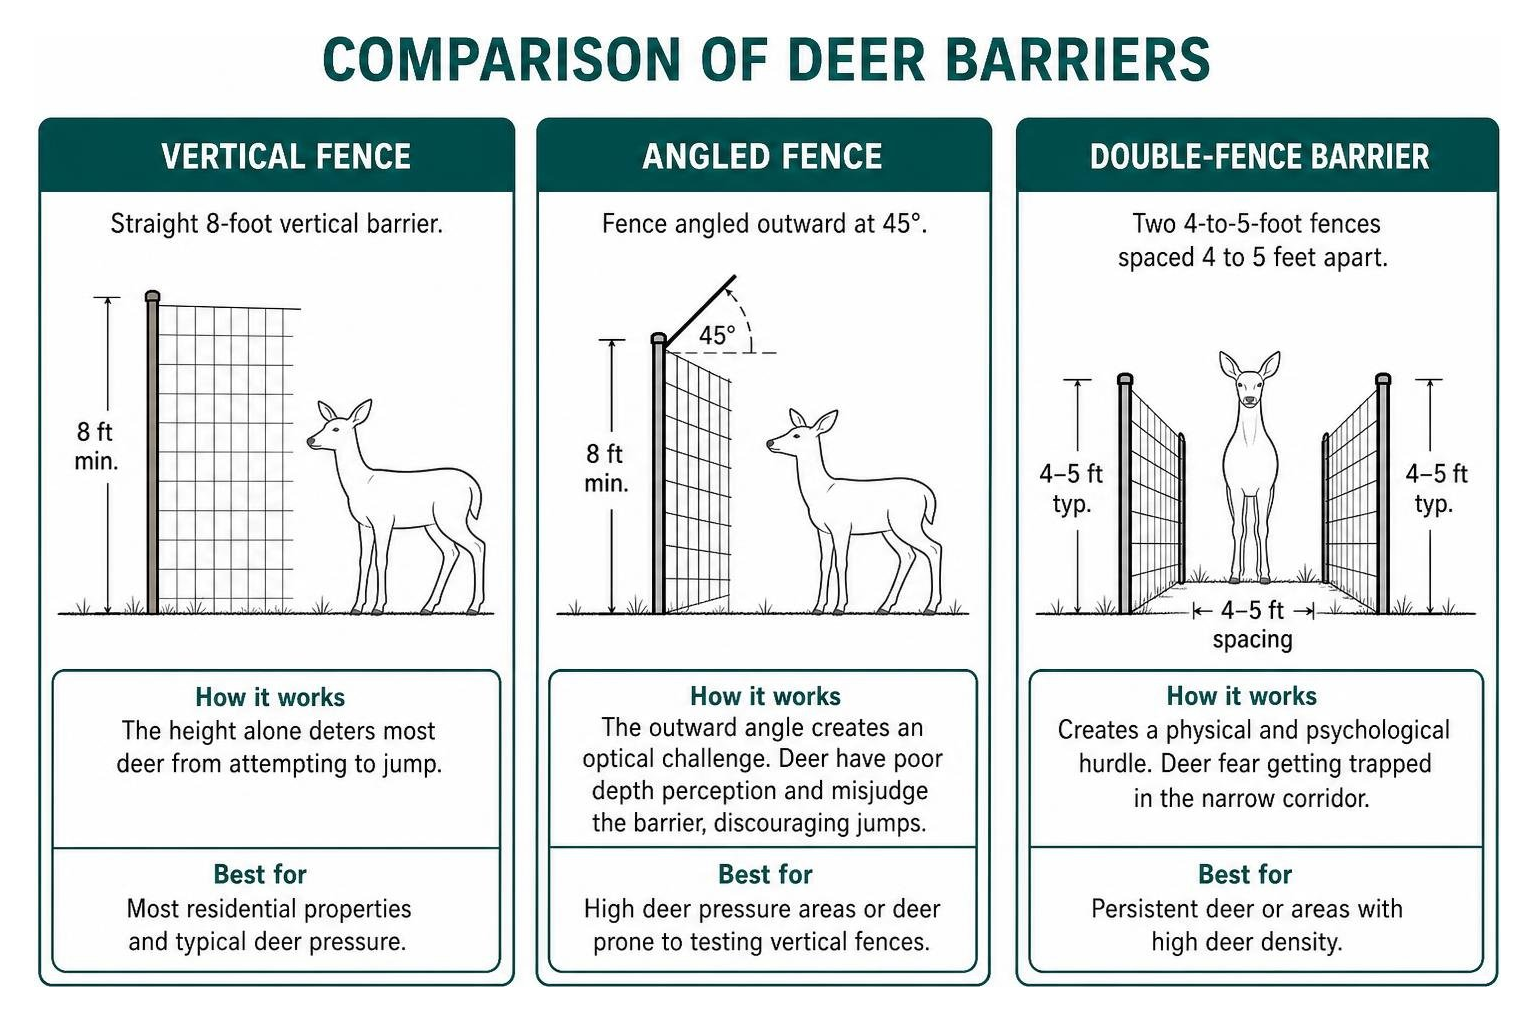
- Angled Fencing: Installing a fence tilted outward at a 45-degree angle presents an optical challenge. Deer have poor depth perception and struggle to calculate the width and height of an angled barrier, discouraging jump attempts.
- Double Fence Barriers: Two parallel 4-to-5-foot fences spaced 4 to 5 feet apart create a physical and psychological hurdle. While deer can easily clear a 5-foot height, they fear getting trapped in the narrow corridor between the two barriers.
Supplementary Protection Planning
To reinforce your physical barrier during peak foraging seasons:
- Integrate deer-resistant plantings (such as lavender, boxwood, and ornamental grasses) along the outer fence line to eliminate immediate food incentives.
- Pair physical barriers with motion-activated water deterrents or organic scent sprays around high-risk entry corridors.
Long-Term Fence Maintenance and Inspection Tips
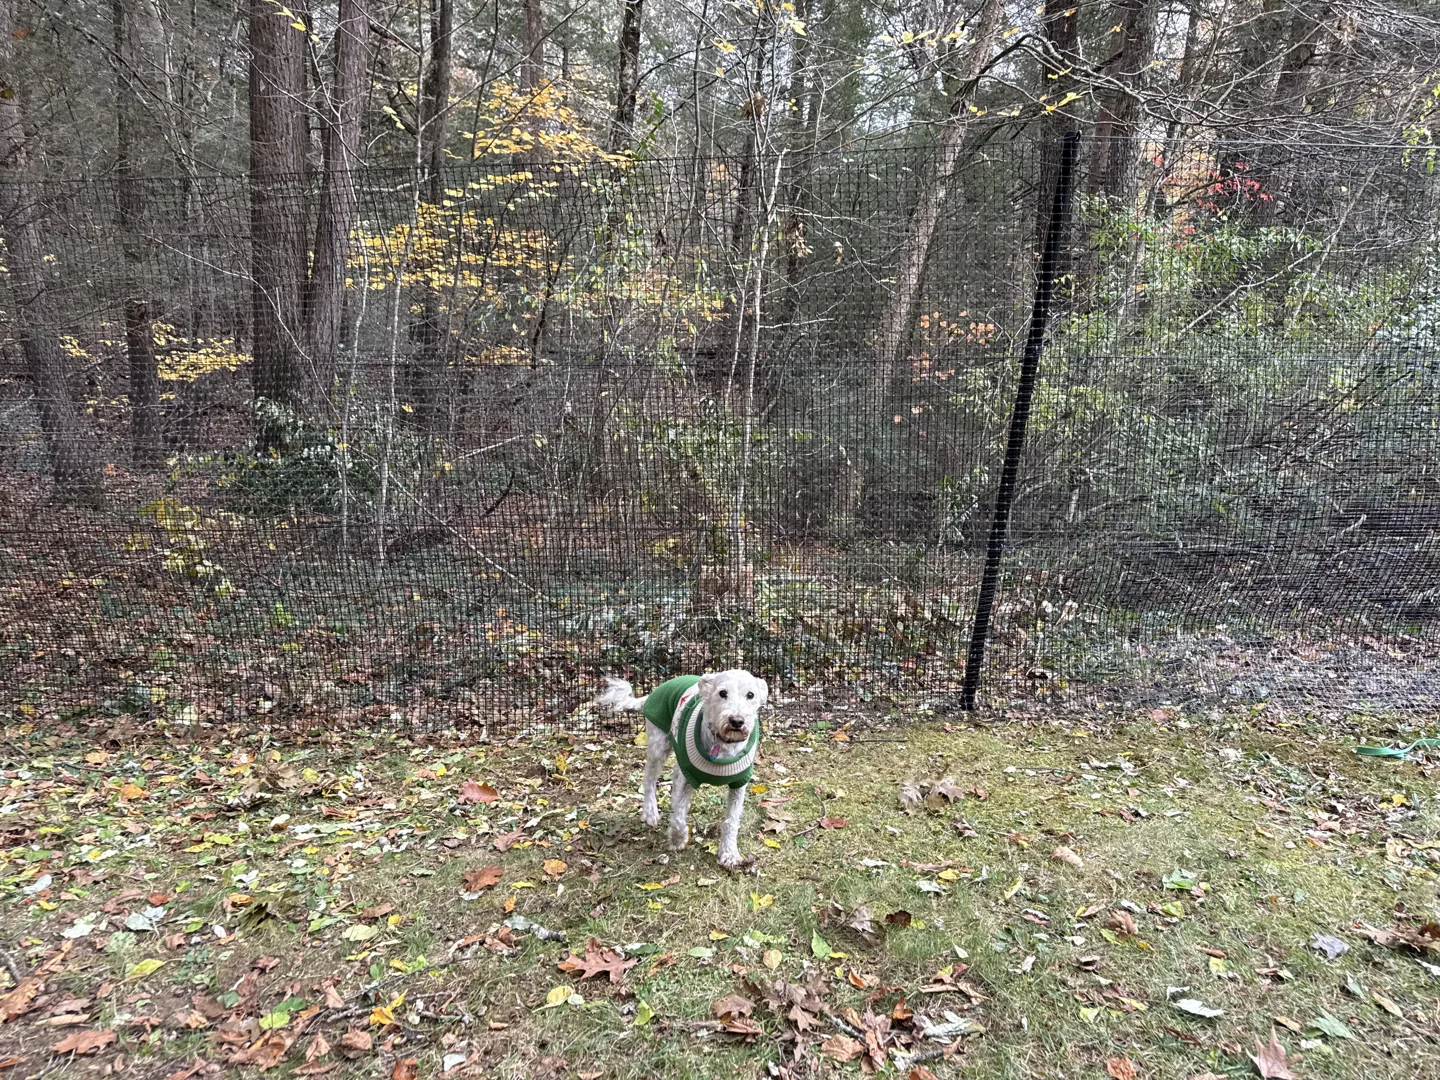
A high-tensile deer fence requires minimal upkeep, but regular inspections ensure it remains impenetrable:
- Perform Seasonal Walkthroughs: Walk the entire fence line every spring and autumn. Check turnbuckles and retension monofilament lines that have loosened under snow or temperature swings.
- Inspect Ground Stakes: Heavy frost heaves can dislodge ground stakes. Drive loose stakes back into the earth to eliminate gaps along the bottom apron.
- Clear Overhanging Limbs: Trim dead branches hanging above the fence line to prevent treefalls from crushing the top tension cable.
- Patch Small Tears: Inspect the lower mesh for small rodent chew holes. Splice in patches of HDPE or galvanized wire using heavy-duty zip ties.
- Lubricate Gate Hardware: Apply marine-grade grease or silicone spray to gate hinges and latch mechanisms twice a year to ensure smooth operation.
Frequently Asked Questions About Deer Fence Installation
How tall should a deer fence be to prevent jumping?
A standard deer fence should stand between 7.5 and 8 feet tall. White-tailed deer can clear lower barriers if given a clean takeoff and landing zone. In areas with steep slopes or exceptionally aggressive deer pressure, a 10-foot-tall barrier or an outward-slanted fence is recommended.
How far apart should deer fence posts be spaced?
Posts are typically spaced every 8 to 12 feet. In flat, open areas with moderate wind, 12-foot spacing is sufficient. In rocky ground, high-wind zones, or along sharp elevation changes, space posts 8 to 10 feet apart to keep the top tension wire taut and prevent mesh sagging.
How do I prevent deer and small animals from going under the fence?
Deer naturally attempt to push their noses underneath fencing rather than jump over it. Flare an extra 6 to 12 inches of netting along the ground toward the outside perimeter, pinning it down with ground stakes every 2 to 4 feet. For complete burrowing protection against rabbits and woodchucks, bury the bottom edge 3 to 6 inches underground.
Conclusion
Building an effective deer barrier requires proper planning, the right materials, and secure tensioning from top to bottom. By choosing UV-treated mesh, anchoring strong direct-burial posts, and staking down the bottom apron, you can protect your landscape for years to come.
If you prefer an engineered approach without digging or high-maintenance electric wires, contact our team for professional low-profile deer fence installation across Connecticut, New York, and Massachusetts.